White Long Haired Dog: 13 Breeds
After much deliberation about your next pet, you’ve decided on a white long haired dog, large in size. Doesn’t that sound like you’re aiming to
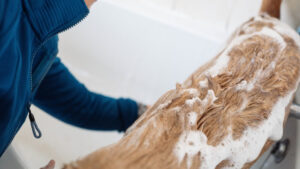
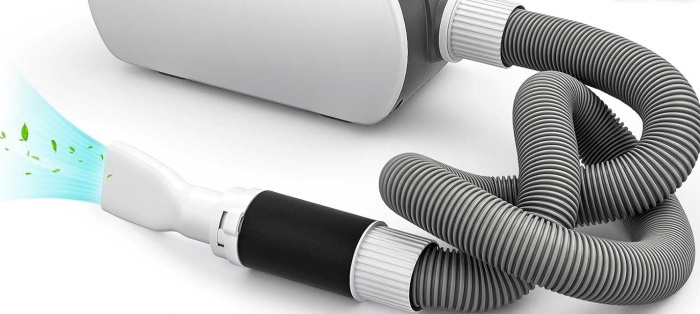
If you’re a proud owner of a dog hair dryer, you know how essential it is for keeping your furry friend’s coat dry and well-groomed. But just like any other device, your dog hair dryer needs a little TLC to ensure it performs its best.
In this comprehensive guide, we’ll dive into the world of cleaning products and tools designed specifically for dog hair dryers. Whether you’re dealing with stubborn fur, unpleasant odors, or want to extend the life of your device, we’ve got you covered.
When it comes to cleaning your dog hair dryer, you’ll need a variety of cleaning products to get the job done effectively. Here are the essential categories:
General-purpose cleaning solutions work wonders for routine maintenance. They help remove dust and dirt from the exterior of your dog hair dryer. These versatile cleaners are gentle on your device’s surfaces, ensuring they stay in great condition for years to come.
To use, simply apply the cleaner to a soft cloth and wipe down the exterior of your dryer. It’s a quick and easy way to keep your device looking its best.
For those tough-to-tackle stains and smudges, stain removers are your go-to option. They’ll leave your dog hair dryer looking as good as new.
Whether it’s a stubborn paw print or a splash of grooming product, a reliable stain remover can make all the difference in restoring your dryer’s appearance.
To use, apply a small amount of the stain remover to a cloth or sponge and gently scrub the affected area. With a little effort, those stubborn stains will be history.

Keeping your dog hair dryer germ-free is crucial, especially when it’s used on various pets. Disinfectant cleaners will ensure a hygienic grooming experience for your furry companion. These cleaners effectively kill bacteria and viruses, providing peace of mind that your dog’s coat remains clean and free from potential contaminants.
To disinfect your dryer, simply spray or wipe the disinfectant solution on the surfaces, paying special attention to areas that come into contact with your pet. Let it sit for a few minutes before wiping it off, ensuring a germ-free device.
Banish any lingering odors with specialized deodorizers, leaving your dog hair dryer smelling fresh and clean. Dogs can bring all sorts of odors into the grooming session, and deodorizers help neutralize and replace them with pleasant scents.
This not only benefits your dog but also makes the grooming experience more enjoyable for you. Simply spray or apply the deodorizer to the interior of your dryer and let it sit for a few minutes. Afterward, turn on the dryer briefly to ensure the deodorizer is evenly distributed. Your dryer will be smelling fresh in no time.
While not a cleaner per se, lubricants are essential for ensuring your dog hair dryer’s moving parts operate smoothly. Over time, the internal components of your dryer can become stiff or squeaky, affecting its performance.
Applying a specialized lubricant to these parts can help extend the life of your device and maintain its efficiency. Consult your dryer’s manual to identify the parts that require lubrication and follow the manufacturer’s instructions for proper application.
Cleaning wipes are a convenient option for quick touch-ups and spot cleaning. These pre-moistened wipes are designed to clean and disinfect surfaces effectively.
They are particularly useful for maintaining the cleanliness of the handle, buttons, and switches on your dog hair dryer. Keep a pack of cleaning wipes handy for regular maintenance and to tackle spills or messes quickly.
The right cleaning tools are essential for thorough cleaning of your dog hair dryer. Here are the tools you’ll need:
Soft brushes are ideal for removing loose fur and dust from the exterior and air vents of your dog hair dryer. Regular brushing prevents the build-up of dirt and keeps the device functioning optimally.
Make it a part of your maintenance routine, and you’ll extend the lifespan of your dryer. To clean the brush itself, use warm, soapy water and allow it to dry completely before reattaching it to the dryer.
A gentle cotton cloth or towel helps you wipe down the surfaces without scratching or damaging your device. It’s crucial to use a soft, lint-free material to avoid leaving any residue or scratches on the dryer’s exterior.
A clean, dry cloth can give your dryer that polished look. Wash and replace your cleaning cloth regularly to ensure it remains effective and free from contaminants.
For those hard-to-reach crevices, a scraper or spatula will help you remove dirt and grime effectively. These tools are especially handy for getting into tight spaces, like the edges of air vents and buttons, ensuring a thorough clean. When using a scraper or spatula, be gentle to avoid damaging the surfaces you’re cleaning. Regularly clean these tools after use to prevent the transfer of dirt and debris.
Keep the air passages clear with a pipe cleaning tool, ensuring efficient airflow for drying your dog’s coat. A blocked airflow can reduce the effectiveness of your dryer, making grooming sessions longer and less comfortable for your pet.
Regularly cleaning the pipes can prevent this issue. Follow your dryer’s manual to locate and clean the pipes properly. Use a specialized pipe cleaning brush or tool to remove any accumulated dust or debris.
Protect yourself during cleaning with goggles or a face shield to shield against debris and cleaning agents.
Your safety is paramount when using cleaning products, and wearing protective gear like goggles or a face shield is a simple yet effective way to safeguard your eyes and skin.
When using cleaning agents, ensure the area is well-ventilated to minimize exposure to fumes.
In addition to goggles or a face shield, wearing gloves is another safety precaution to consider when cleaning your dog hair dryer. Gloves protect your hands from direct contact with cleaning agents and potential allergens, ensuring your skin remains safe and free from irritation.
Choose gloves that are comfortable and provide adequate protection for the task at hand. Dispose of disposable gloves after use and wash reusable gloves regularly.
To maintain the motor and heating element of your dog hair dryer, follow these additional steps:
To keep your dog hair dryer in top condition, it’s essential to establish a routine cleaning and maintenance schedule. Here’s a suggested timetable to help you stay on track:
Daily Maintenance (After Each Use):
Weekly Maintenance:
Monthly Maintenance:
Quarterly Maintenance:
Annual Maintenance:
By adhering to this maintenance schedule, you can ensure that your dog hair dryer remains in excellent condition, providing reliable performance for years to come.

Owning a dog hair dryer can be a game-changer in your pet grooming routine, but it’s essential to maintain it properly.
With the right cleaning products and tools, along with a well-structured maintenance schedule, you can ensure that your dog hair dryer remains in excellent condition. This not only extends the device’s lifespan but also ensures the safety and comfort of your furry friend during grooming sessions.
In conclusion, the key to a long-lasting and efficient dog hair dryer lies in regular cleaning and maintenance. By using the appropriate cleaning products and tools and following a maintenance schedule, you can keep your device looking and performing at its best.
Remember to follow the manufacturer’s instructions for cleaning and maintenance, and always prioritize safety when using cleaning agents. With these tips in mind, you and your furry companion can enjoy the benefits of a clean and reliable dog hair dryer for years to come.