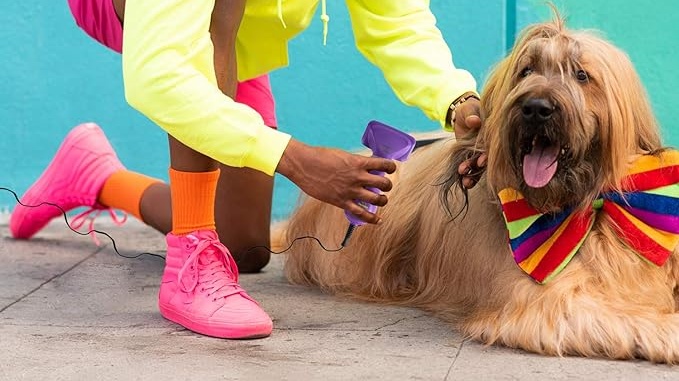
Are you tired of the same old hair dryer for dogs and want to give your furry friend a unique grooming experience? In this guide, we’ll dive into the world of DIY dog hair dryers and explore the materials and components you’ll need to create a tail-wagging masterpiece.
Power and electrical components
Let’s start with the essential power and electrical components you’ll require for your DIY dog hair dryer:
Power source selection
When it comes to creating your DIY dog hair dryer, the first step in the process is selecting the appropriate power source. Your choice here will determine how your hair dryer functions and what type of power it requires to operate effectively.
There are various options to consider:
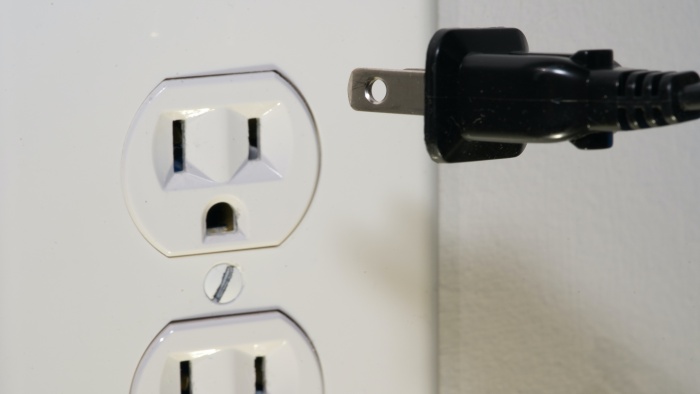
- AC Adapters: These adapters allow you to connect your dog hair dryer to a standard electrical outlet. They provide a consistent and reliable source of power, ensuring that your dryer functions optimally during grooming sessions. Make sure to choose an adapter that matches your local voltage and frequency requirements.
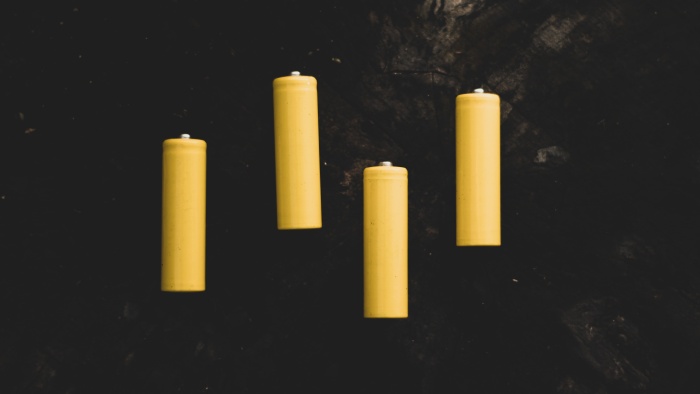
- Batteries: If you’re looking for portability and flexibility, battery-powered dog hair dryers might be the way to go. These dryers are cordless, making them ideal for outdoor or on-the-go grooming. However, it’s essential to select high-capacity rechargeable batteries to ensure longer operating times and reduce the environmental impact of disposable batteries.
- Alternative Energy Solutions: For eco-conscious DIY enthusiasts, exploring alternative energy sources like solar power or wind power can be an exciting option. While more complex to implement, renewable energy solutions align with sustainability goals and can reduce your carbon footprint.
When deciding on the power source, consider factors such as your grooming environment, the frequency of use, and your commitment to sustainability. Ensure that the power source you choose aligns with your DIY dog hair dryer’s design and purpose, as it will significantly impact its overall performance.
Wires and plugs
Wires and plugs may seem like straightforward components of your DIY dog hair dryer, but their selection and installation play a crucial role in safety and functionality. It’s essential to understand the types of wires and plugs available and how to ensure a secure electrical connection for your dryer.
- Wire Gauge: The wire gauge or thickness determines the amount of current that can pass through the wires safely. For your DIY dog hair dryer, choose wires with an appropriate gauge to handle the electrical load without overheating or causing voltage drops. Thicker wires are typically more suitable for high-powered dryers.
- Insulation: Ensure that the wires you use are properly insulated to prevent electrical shocks and short circuits. Insulation materials like PVC or rubber coatings provide protection against exposed conductors.
- Plug Type: Select a plug type that matches your chosen power source. Different regions have various plug designs, so make sure your plug is compatible with the outlets in your area. It’s also essential to check if the plug has grounding features for added safety.
- Cord Length: Consider the length of the cord you’ll need for your DIY dog hair dryer. Longer cords provide more flexibility, but excessive length can lead to tangles and inconvenience during grooming. Measure the distance from the power source to the grooming area to determine the ideal cord length.
- Cord Strain Relief: To prevent damage to the wires where they connect to the plug or dryer, use cord strain relief mechanisms. These components protect the wires from bending or pulling at vulnerable points, prolonging the life of your DIY dog hair dryer.
By carefully selecting wires and plugs that match your DIY dog hair dryer’s power requirements and ensuring proper insulation and strain relief, you’ll create a safe and reliable electrical connection. This attention to detail will contribute to the overall effectiveness and safety of your custom grooming tool.
Switches and control panel elements
The switches and control panel elements of your DIY dog hair dryer are the interface between you and your pet’s grooming experience. Customizing these components allows you to tailor the dryer’s controls to suit your pet’s specific needs and preferences.
- Types of Switches: There are various types of switches available, including toggle switches, rocker switches, and push-button switches. Each has its advantages and aesthetics. Consider factors such as ease of use and durability when selecting the right switch type for your DIY dog hair dryer.
- Control Panel Layout: The arrangement of switches, buttons, and dials on your dryer’s control panel is crucial for user-friendliness. Create a clear and intuitive layout that allows you to adjust settings with ease while grooming your pet.
- Adjustable Settings: Depending on your DIY dog hair dryer’s complexity, you may have multiple adjustable settings, including airflow speed, temperature, and timers. Ensure that these controls are easily accessible and clearly labeled for efficient grooming sessions.
- Safety Considerations: Implement safety features in your control panel design, such as overheating protection or emergency shut-off switches. These features will help prevent accidents and ensure your pet’s safety during grooming.
- Material Selection: Choose durable and pet-safe materials for the control panel elements. Materials like ABS plastic or pet-friendly coatings ensure longevity and safety.
Customizing the switches and control panel elements of your DIY dog hair dryer allows you to create a user-friendly and pet-safe grooming tool. Consider your pet’s comfort and grooming needs when designing this crucial part of your dryer.
Timers, temperature sensors, and other electronic elements
In the world of DIY dog hair dryers, incorporating electronic elements such as timers and temperature sensors can take your grooming tool to the next level of functionality and convenience.
- Timers: Timers allow you to set specific drying durations, ensuring that you don’t over-dry your pet’s coat. This feature is especially useful for preventing overheating and discomfort during grooming sessions. Select a timer that offers a range of customizable time settings to suit different coat types.
- Temperature Sensors: Temperature sensors provide real-time feedback on the dryer’s heat levels. This information helps you monitor and adjust the temperature to ensure your pet’s comfort and safety. Consider incorporating digital temperature displays or warning lights that indicate when the temperature exceeds safe limits.
- Remote Control: For added convenience, explore the possibility of remote control options for your DIY dog hair dryer. Remote controls allow you to adjust settings from a distance, reducing disruptions during grooming and ensuring your pet’s comfort.
- Power Efficiency: Incorporate power-efficient electronic components to minimize energy consumption. This not only reduces your environmental footprint but also extends the lifespan of your dryer.
- Integration: Ensure that the electronic elements seamlessly integrate with the rest of your DIY dog hair dryer’s design. Proper placement and wiring are essential to prevent interference and ensure reliable operation.
By including timers, temperature sensors, and other electronic elements, you can transform your DIY dog hair dryer into a smart grooming tool that enhances your pet’s safety and comfort. These features make grooming sessions more efficient and enjoyable for both you and your furry friend.
Conclusion
In conclusion, creating a DIY sèche-cheveux pour chiens is a rewarding endeavor that allows you to pamper your pet while adding a personal touch to grooming sessions. By selecting the right materials and components for your unique needs, you can design a hair dryer for dogs that ensures their comfort, safety, and enjoyment.
So, grab your toolkit, unleash your creativity, and embark on the journey of crafting a DIY hair dryer for dogs that will leave your pet looking and feeling their best. It’s a fun project that strengthens the bond between you and your furry companion while providing top-notch grooming. Make your pet’s tail wag with delight!